Web
The MyLINK Connect Web plugin can integrate your chatbot in any web page regardless of the underlying technology.
By leveraging all the different functions and methods offered by our default integration script you can drastically change both appearance and behavior of your Xenioo chatbot.
Embedding MyLINK Connect into your web site
To embed MyLINK Connect chat widget after publishing, you can just copy and paste the embed example you can find in the "How To Embed" tab of the publishing page.
There are three ways to embed the chatbot in your web site.
Chat Widget
This is the standard way to insert the chabot in your page as a chat widget.

The position of the embed code inside the page is not relevant: the MyLINK Connect web widget will automatically and quickly create all the required components as child of your page body, without arming your existing page layout.
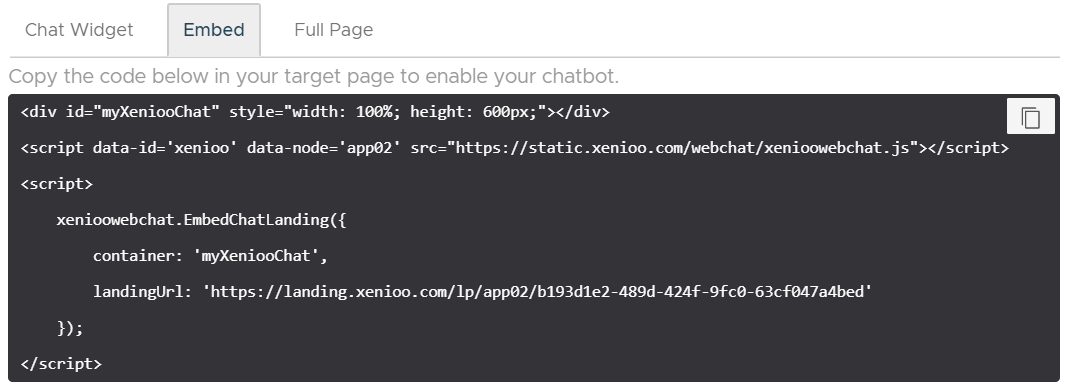
Embed
You can embed the full chatbot conversation area in any point of your web page.

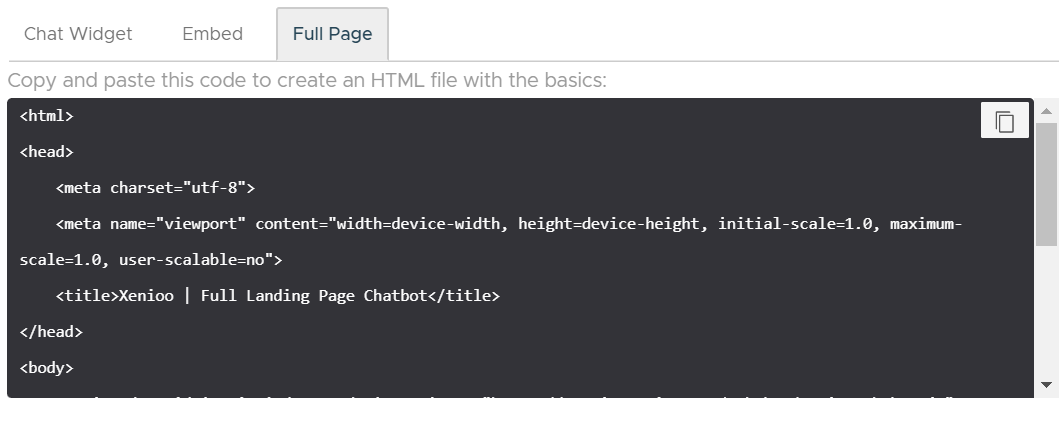
Full Page
You can host your entire chatbot conversation area full page in your web site.

Web channel and conversations
Conversations happened inside the Web Channel are saved by MyLINK Connect only if the user has interacted with the chatbot at least once.
This is done automatically by Xenioo to avoid cluttering your conversation are with potentially thousands of conversations that never had any interaction beside the chatbot initial greeting.
For this reason, your messages count may differ from the one you could infer from checking the actual conversations list.
You can disable this default behaviour by setting the variable override_web_forget to true in any conversation you would like to keep, regardless of any interaction hanppened.
General Channel Settings
Domains
In this field you must specify the list of domains that will implement the MyLINK Connect chat widget. You must use the full domain name (e.g. www.mysite.com). Multiple domains can be specified by dividing each entry with a semicolon (;). Your chatbot script will fail to initialize until the hosting domain is specified in this this field.
If, after publishing don't see the chatbot widget visible on your page try opening your browser console and check for the following message:
This MyLINK Connectchatbot is not correctly configured. The chatbot is not published or the current domain is not whitelisted. Please review your settings or contact MyLINK Connect support.
If you see this message, please make sure that the full name of the domain hosting the MyLINK Connect web widget is specified in this field.
Display History
Each user is automatically identified by a unique id and MyLINK Connect chat widget is capable of recalling the original conversation on each subsequent visit. Enabling this flag will force MyLINK Connect to load any previous conversation inside the web widget. If this flag is disabled the conversation will always restart from the beginning at each web page visit.
Enable Sounds
Enable this flag to enable small chat sounds alerting for new messages when the chat widget is minimized.
Enable Text Bubble Html and Scripting
Enable this flag to allow tags and scripts inside your chatbot text bubbles.
Voice
Language
Set the voice language to be used when initializing the browser text-to-speech and speech-to-text engines. Additional voices can be set using scripting.
Enable User Voice
Enabling this flag will enable speech-to-text on supported browsers. Your users will be prompted to allow microphone use by your web page. When enabled, this flag will display a small microphone near the send button of the chat area: the user can use that button to talk to the chatbot and send commands directly using his own voice.
Enable Text Reader
This flag will enable a small speaker icon on the top right corner of the chat widget and will enable the browser text-to-speech engine. If the speaker is turned on by the user, every text bubble will be read using the browser default voice or one of the configured voices.
Reader Specific Voice
In this area you can specify one or more voices you would like to be used by your chatbot. Different browsers may support different voices. MyLINK Connect will try to configure a preferred voice starting from the first one to the bottom one, picking the first one existing. Please not that event when having the same name, different browsers and platforms may choose different pitch, intonation or general tone altogether.
All of the voice options are not available to free accounts.
Behavior Settings
Chat Widget Appear Delay
Use this setting to choose after how many seconds the chat avatar icon will appear on your web page. Setting a value of 0 (zero) means the avatar icon will appear as soon as the chat widget is initialized.
Wait for Widget Click
Enabling this setting will force MyLINK Connect to start the chatbot only when the user actually clicks on the widget avatar icon. Enabling this setting may help you save some monthly messages on high traffic websites since no interaction is really fired until the user actually clicks on your chatbot.
The Wait for Widget Click option is not available to free accounts.
Auto Display Chat Delay
This value sets the amount of seconds after which the chat area will automatically open without the user interacting. The default is zero seconds that translates to no automatic display.
Disable Auto Display On Mobile Devices
Enabling this flag will disable chat area opening on mobile devices if configured through the Auto Display Chat Delay option.
Disable Auto Display For Returning User
This flag will prevent the web chatbot from automatically opening if the user has already visited your web page.
Disable Auto Display After First Conversation
This flag will prevent the web chatbot from automatically opening if the user has already had a conversation with it.
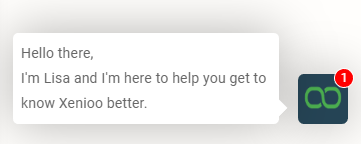
Display Callout Message Bubble
This feature will display a bubble outside of the avatar area containing the same text you've configured in the start interaction and with the same delays. If you select "Display First Message", only the first interaction message will appear in the callout bubble.

Context Menu Mode
This setting changes the way context menus are displayed by the web plugin. By default context menus are displayed as a 3 lines button near the chat text area.
Choosing "Floating Dialog Window" instead will display the menu as an external window similar to the "Floating Card" content.
The floating menu content is managed by adding Nested, Text or URL buttons at bot level inside your chatbot design. No context menu will be displayed on your chat area until the context menu has been configured.
Open Automatically
Enable or disable automatic display of the context menu. This setting applies to both context menu visualization modes.
Floating Dialog Title And Text
Use these boxes to change the text that is displayed by the Floating Dialog Window context menu. Since the floating menu is built as the chatbot starts, only runtime, pre-defined variables are available for automatic parsing.
Chat Area Settings
Send Button Text
Enable or disable the standard send button on the right of the user chat text area. This setting is off by default.
Message Time Text
This is the default text used under each MyLINK Connect reply part to display the time of the message. You can change the text to anything you like using these pre-defined format placeholders:
Format
Value
HH
24H format hours value (eg. 14, 18 etc)
hh
12H format hours value (eg. 11, 12 etc)
mm
Minutes
ss
Seconds
AMPM
Will become AM or PM depending on actual time of message
Input Text Placeholder
This is the text that MyLINK Connect will display as a placeholder for the user chat area
Description
This is the text that will appear right below your chatbot title inside the chatbot widget area.
Display Mode
Here you can choose if the chat area will be displayed as a box at the bottom right of the page or as a full height panel on the right side of the page.
Message Start Position
This is how new messages will be displayed in the chat area. Setting Top will make the chat start from the top of the area while choosing bottom will make the chat flow from the bottom to the top.
Hide Message Area when Interaction User Chat is disabled
If enabled, this flag will automatically hide the bottom chat area, where the user inputs all replies whenever the current interaction is set to disable user chat.
Avatar
Icon
This is the image that will be used by your chatbot as web page icon and inline avatar during chat. If you already set the global chatbot avatar in your chatbot settings you do not need to specify it again here. Please note that you cannot upload an avatar unless your account has available storage space. Free accounts are not allowed to personalize their chatbot avatar.
Avatar Display
Choose if the avatar is displayed only on the title section of the chat area or beside each message.
Display User Avatar Image
Enable this flag if you wish to see the user avatar image beside each user reply text. The avatar image is automatically retrieved from the profile_pic variable.
Bubble Position
Choose if the avatar is displayed beside the first bubble of each interaction or beside the last one.
Style
Background Color
This is the main chatbot background color for the web widget. The default value is MyLINKConnect Green.
Foreground Color
This is the chatbot main foreground color. The default value is white.
Style Sheet
Here you can upload a customized css file that will override (or be added to) the standard MyLINKConnect styles. Please note that you cannot upload a customized css file unless your account has available storage space.
Style Sheet Mode
Using this field you can choose how your custom style sheet will be used. You can choose to completely overwrite the existing default Xenioo style or to load your custom style sheet together with the MyLINK Connect one.
Depending on the amount of customization you're going to do it may be faster to simply fully replace the MyLINK Connect style sheet or load an additional style sheet to override just some of the classes.
Variables
In this free text area you can specify every variable you would like to be forwarded to your client widget by MyLINK Connect. Forwarded variables are made available at client level so that your client scripts action or any other client script can use them at run-time. Forwarded variables are sent to the client at every Connect reply and thus are updated in real-time.
Variables forwarded to the client are not encrypted. We strongly advise against forwarding any variable value that contains sensitive data as it may be accessed by a debugging console.
Variable forwarding is not available to free accounts.
Further Reading
Just about all of the articles and tutorials by Connect (Xenioo) can be applied to our web chat plugin. Additionally, these chatbot examples can be used as basic starting points for more advanced integrations.
Web Chat Widget supports text formatting. See here to learn more.
Last updated